Recently, I’ve been thinking about how I can use DevOps tools and processes to improve the way I do things and this has led me to completely revamp my blog. My existing Wordpress blog has now been replaced with a shiny new blog using Hugo - a static website engine, hosted on Github Pages and automated using the continuous integration tool AppVeyor. In this article, I’m going to go through a step-by-step guide on how I set everything up.
Step 1. Install Hugo & Build New Site
First off, it’s worth mentioning that this step-by-step guide assumes you’re running a Windows environment and using the Windows package manager Chocolatey (If you don’t know about Chocolatey then you NEED to get this in your life right now. Check it out here).
I won’t go into too much detail about Hugo because there’s some great stuff online already but essentially, Hugo renders all of your static content into HTML, CSS and JavaScript. This makes pages on the site really quick to load and easy to manage as you don’t rely on a traditional CMS to manage content.
Install Hugo by running:
choco install hugo -y
Next up, creating a new skeleton site structure is as simple as running:
hugo new site mynewblog
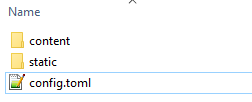
If you have a look in your newly created site folder, it’ll look something like this:

Now that we have the basic layout, we need to add a theme. I ended up browsing the theme section on Hugo’s website to find one I liked. Once you’ve found a theme that you like, clone it into the themes folder of your newly created site.
On my local machine, I use posh-git which integrates Git nicely into PowerShell (Including tab completion). To install posh-git, simply run the following from PowerShell:
choco install poshgit -y
Note: You may need to reload your PowerShell session to use the Git commands from PowerShell.
With Git installed, clone the theme you like:
cd themes
git clone https://github.com/example/example-theme
Usually, a theme will have an ’exampleSite’ directory which contains an example structure for the theme including an example config.toml configuration file:
I copied these files over into the root of my new Hugo site and started tailoring to fit my needs. I won’t go into any further detail on that part - just play around with it and follow your nose.
So, you’ve got a theme you’re happy with and you’ve tweaked the configuration to your liking? Hugo has a very convenient web server that listens on port 1313 so that you can view how your glorious website will look when built. To make use of this, run the command:
hugo server
The great thing about this is, every time you update any of your static files, the changes will instantly appear at http://localhost:1313
Right, now we’ve got our new Hugo site configured the way we want it, let’s set up our Github pages.
Step 2. Setting up Github Pages to work with our new Hugo site
If you haven’t already got a Github account, head over to GitHub and sign up for one. Once you’ve got your account set up, create a new repository and call it yourusername.github.io e.g. mine is matthorgan.github.io.
For this build, we’re going to be using two branches - ‘source’ which will house all of the static content and ‘master’ which will house the Hugo built content. Doing it this way allows us to have both the static and generated content completely version controlled.
From PowerShell, browse to the root directory of your Hugo site and run the following commands to set up your local repository and push it to your Github repo:
git init
git add --all
git commit -m "Initial Hugo static file commit"
git remote add origin https://github.com/yourusername/yourusername.github.io.git
git push -u origin source
Note: Replace ‘yourusername’ with your actual Github username and repo name
We’ve now got our static content pushed to a branch in our Github Pages repo called ‘source’. At this point, you can move on to the continuous integration with AppVeyor however just for completeness, I’ll continue to explain how you get your page online without a CI tool.
Type the following command from a PowerShell prompt in the root directory of your Hugo site to build the site:
hugo
If you have a look in the root directory, you’ll now see a ‘public’ folder which has all of your built content e.g. HTML, JavaScript, CSS etc.
Change directory into the public folder and type the following:
git checkout -b master
git add --all
git commit -m "Initial Hugo built site commit"
git push -u origin master
You should now have your website online and browsable at https://yourusername.github.io - take a moment to bask in its unfinished glory before we move on to the cool stuff!
Step 3. Using AppVeyor to automate the Hugo build
Having our newly generated website up and running already is cool but each time you add/modify any of the static content, the site will need to be rebuilt and pushed up to GitHub. That’s at least two buttons more than I want to have to press so we’re going to use AppVeyor to automate it for us.
Head over to AppVeyor and sign up with GitHub if you haven’t already got an account. Once you’re logged in, you should be able to add your GitHub pages repo as a new project by clicking Projects –> New Project and selecting your GitHub repo.
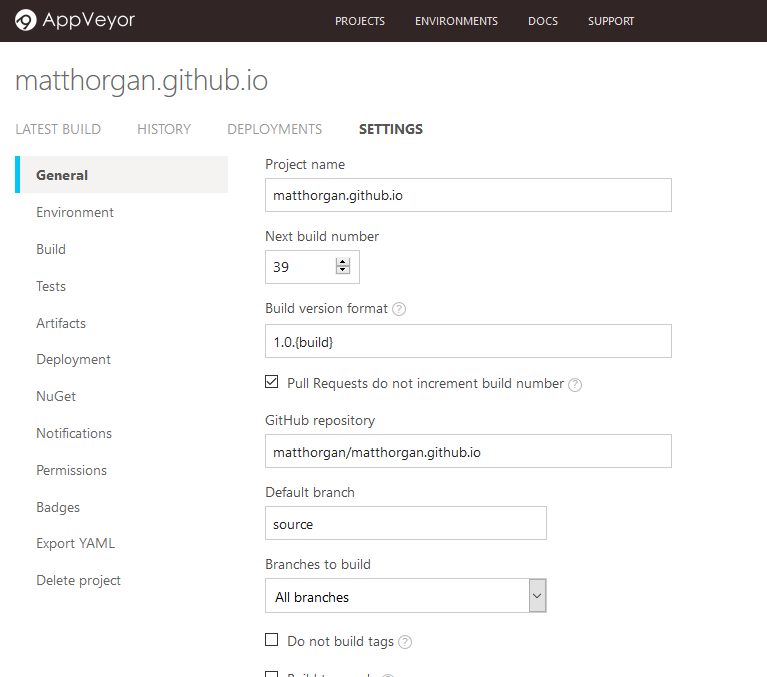
At this point, we have two options on how we want to configure the project. You can edit the settings of your project and configure everything within the AppVeyor UI or you can create an appveyor.yml file with the relevant settings and place it in the root of your GitHub repo. Here’s what you’ll see in the AppVeyor UI:
You can see from the menu in the above screenshot that there are so many possibilities when it comes to the configuration of your project. A cool feature of the UI is that you can export to an appveyor.yml file which makes it really easy to understand what’s going on. Another great way to understand all of the possible settings within an appveyor.yml file is to check out this reference guide here.
Note: The UI and appveyor.yml are mutually exclusive so you’ll have to pick one or the other.
With so many options available, it’s important to understand exactly what you want your build to accomplish. To stop me from going off on a tangent, I put together a basic flow for what I needed AppVeyor to do:
- Clone the ‘source’ branch into the AppVeyor build
- Set up environment by installing Hugo
- Build site with Hugo
- Clone ‘master’ branch of GitHub Pages repo
- Copy all newly generated content into the newly cloned ‘master’ directory
- Add and commit new files to ‘master’ branch
- Push new commits back up to master
If you have a look back at the screenshot of the AppVeyor settings, you can see an option to specify a default branch. I made sure to set this to my ‘source’ branch which ensures AppVeyor clones the ‘source’ branch into the AppVeyor build.
Below is the final appveyor.yml file that I ended up with (I’ll explain it in more detail shortly). I pushed this to my ‘source’ branch which instructs AppVeyor to execute the build every time something new is pushed to the source branch e.g. a new blog post.
version: 1.0.{build}

pull_requests:
  do_not_increment_build_number: true

environment:
  source_dir: public
  git_name: Matt Horgan
  git_email: matt@matthorgan.xyz
  target_dir: temp
  target_branch: master
  repo: https://github.com/matthorgan/matthorgan.github.io.git
  access_token:
    secure: RcRrztcM59Im5xl40yelyNPtMZ8ydkEtFQ8nzen+4tcId4U8eT8yrTxTDOyUnJZu

install:
  - cmd: cinst hugo

build_script:
  - cmd: hugo

# Add newly built site to the master branch
on_success:
 - ps: Invoke-Expression "git config --global credential.helper store" 2>&1
 - ps: Add-Content "$env:userprofile\.git-credentials" "https://$($env:access_token):x-oauth-basic@github.com`n"
 - ps: $revision = Invoke-Expression "git rev-parse HEAD" 2>&1
 - ps: New-Item -Path $env:target_dir -ItemType Directory
 - ps: cd .\$env:target_dir
 - ps: Invoke-Expression "git clone --branch $env:target_branch $env:repo (Get-Location).Path" 2>&1
 - ps: Copy-Item -Path ..\$env:source_dir\* -Destination . -Recurse -Force -Exclude @(".git","appveyor.yml")
 - ps: Invoke-Expression "git config --global user.name $env:git_name" 2>&1
 - ps: Invoke-Expression "git config --global user.email $env:git_email" 2>&1
 - ps: Invoke-Expression "git add --all" 2>&1
 - ps: Invoke-Expression "git commit --allow-empty -m 'Built from commit $revision'" 2>&1
- ps: Invoke-Expression "git push origin $env:target_branch" 2>&1
Some of the settings are self-explanatory but I’ll go through the different sections and explain what’s going on:
environment:
  source_dir: public
  git_name: Matt Horgan
  git_email: matt@matthorgan.xyz
  target_dir: temp
  target_branch: master
  repo: https://github.com/matthorgan/matthorgan.github.io.git
  access_token:
    secure: RcRrztcM59Im5xl40yelyNPtMZ8ydkEtFQ8nzen+4tcId4U8eT8yrTxTDOyUnJZu
In the above section, we set up our environment variables which get used further down in the appveyor.yml file. The crucial part of this section is the secure access token which must be created to give AppVeyor permissions to push to your repo. For a great guide on how to set this up, check out this article on the AppVeyor site.
The next interesting section of the AppVeyor YAML file is as shown:
install:
  - cmd: cinst hugo

build_script:
  - cmd: hugo
The ‘cinst hugo’ command tells AppVeyor to install Hugo using Chocolatey whilst the next line builds the site.
Finally, the PowerShell section of the file:
on_success:
 - ps: Invoke-Expression "git config --global credential.helper store" 2>&1
 - ps: Add-Content "$env:userprofile\.git-credentials" "https://$($env:access_token):x-oauth-basic@github.com`n"
 - ps: $revision = Invoke-Expression "git rev-parse HEAD" 2>&1
 - ps: New-Item -Path $env:target_dir -ItemType Directory
 - ps: cd .\$env:target_dir
 - ps: Invoke-Expression "git clone --branch $env:target_branch $env:repo (Get-Location).Path" 2>&1
 - ps: Copy-Item -Path ..\$env:source_dir\* -Destination . -Recurse -Force -Exclude @(".git","appveyor.yml")
 - ps: Invoke-Expression "git config --global user.name $env:git_name" 2>&1
 - ps: Invoke-Expression "git config --global user.email $env:git_email" 2>&1
 - ps: Invoke-Expression "git add --all" 2>&1
 - ps: Invoke-Expression "git commit --allow-empty -m 'Built from commit $revision'" 2>&1
- ps: Invoke-Expression "git push origin $env:target_branch" 2>&1
On the first two PowerShell lines, we set up our Git credentials to ensure we aren’t prompted for a password utilising our access_token variable we created earlier. We then grab the Git revision number and store it in a variable before creating a new directory and changing into it. Next up, we clone the master branch from our Github repo into the folder we’ve just changed into before recursively copying the ‘public’ built site into the directory (excluding .git and appveyor.yml files).
We now have all of the latest built files copied into the freshly cloned master repo folder. The last thing for us to do is to add our username and email to our Git config, stage the files and commit with reference to the revision number and push it to our master branch.
Note: You might be wondering why all of the Git commands are ran using the Invoke-Expression command and redirect standard error to standard output (2>&1). Without this, it seems that the Appveyor shell treats some of the output from Git as standard error which produces horrible red text and obviously stops the build. By utilising the redirect and Invoke-Expression, the build successfully runs without error.
That's all for now folks... I might come back and add a small section on setting up a custom domain at a later date.